SUMMER DIY: HOW TO MAKE YOUR OWN CANDLES
Every now and then, I get in a crafty mood, and I want to find a simple DIY that will look elegant with a reasonable amount of time and effort. Sometimes I try something completely new; other times, like today, I bring back a classic and give it a seasonal twist!
If you’ve never made candles before, I’m here to tell you that it is soooo easy! As long as you have the ingredients listed below, you’ll be set to do the whole thing from start to finish. They even have candle-making kits on Amazon with all the necessary components, so if that’s easiest for you, here’s one that I’ve tried before.
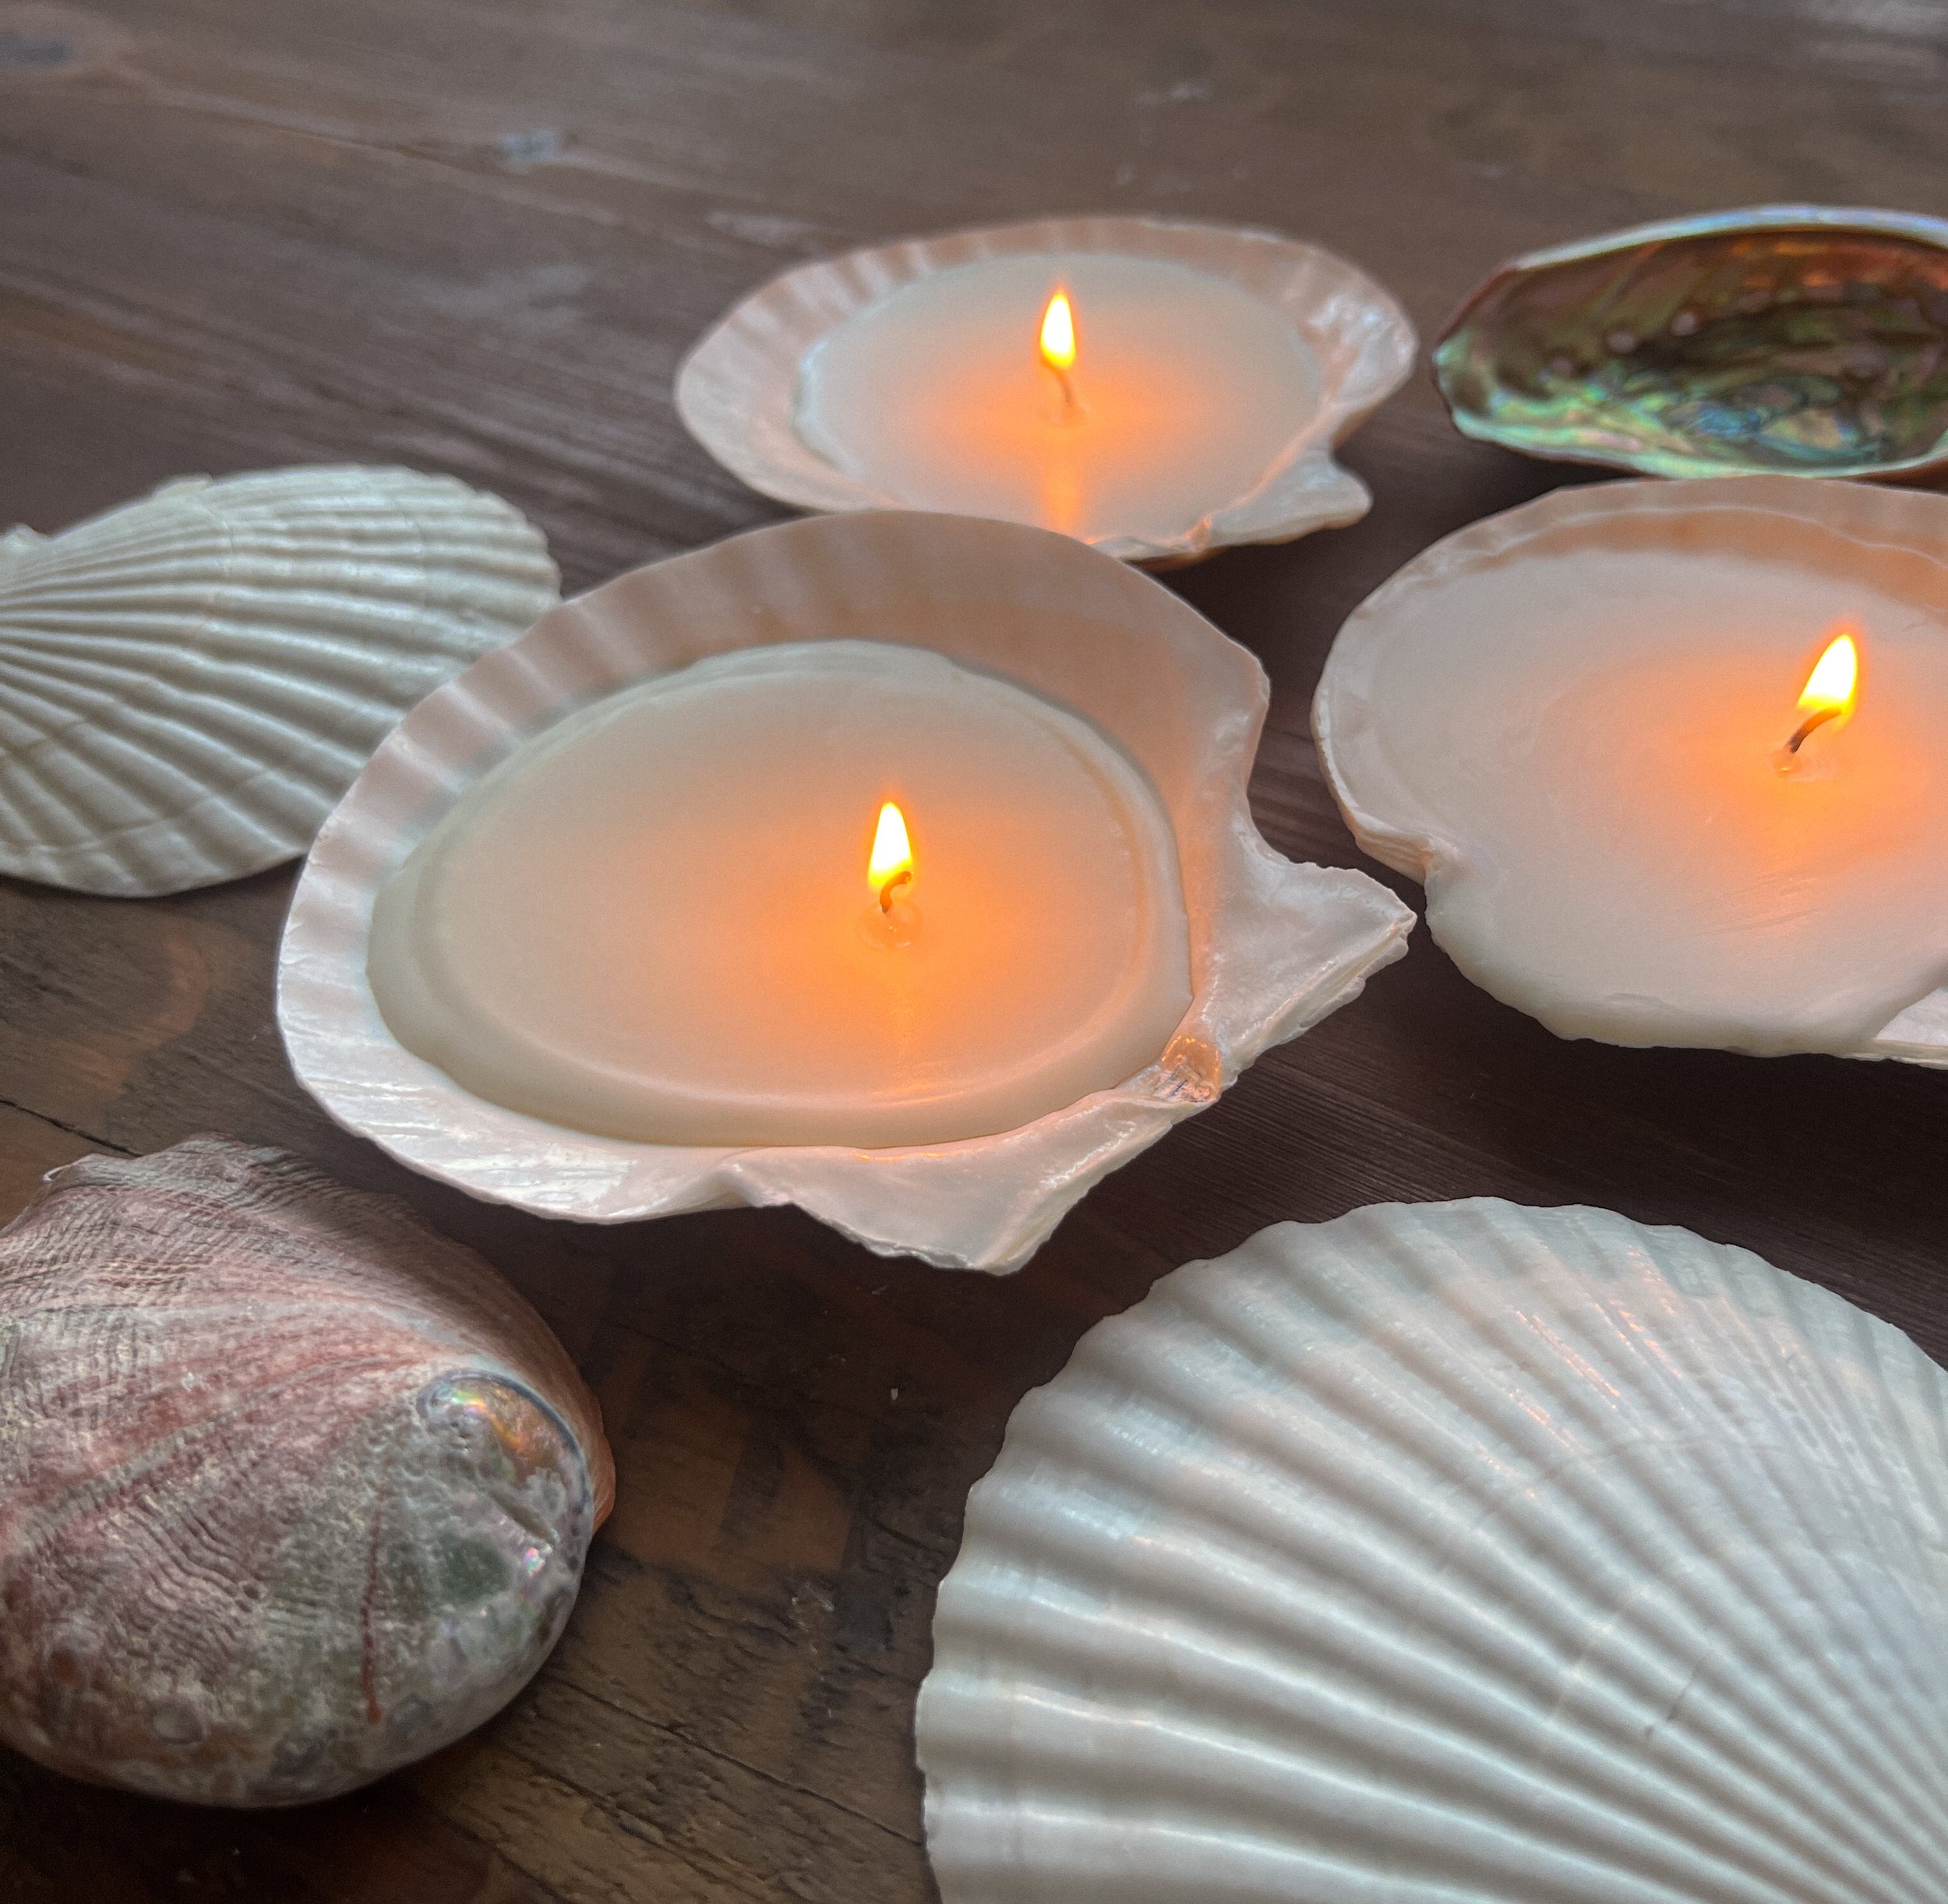
For my seasonal twist, I decided to take an old shell and bring a little life back to it by making it into a candle. The candle can’t be super deep since the shell itself is pretty shallow, but that doesn’t matter! If you end up burning through the entire candle, you’ll know how to make a new one. (Plus, it’s a pretty eco-friendly way to make old things new and repurpose things into practical pieces of decor.)
So let’s get started!
Here’s what you’ll need:
Soy wax flakes
Wick/wick stickers
A vessel (in this case, a sea shell)
Scissors
Double Boiler or hot plate
Essential oils/fragrance (optional)
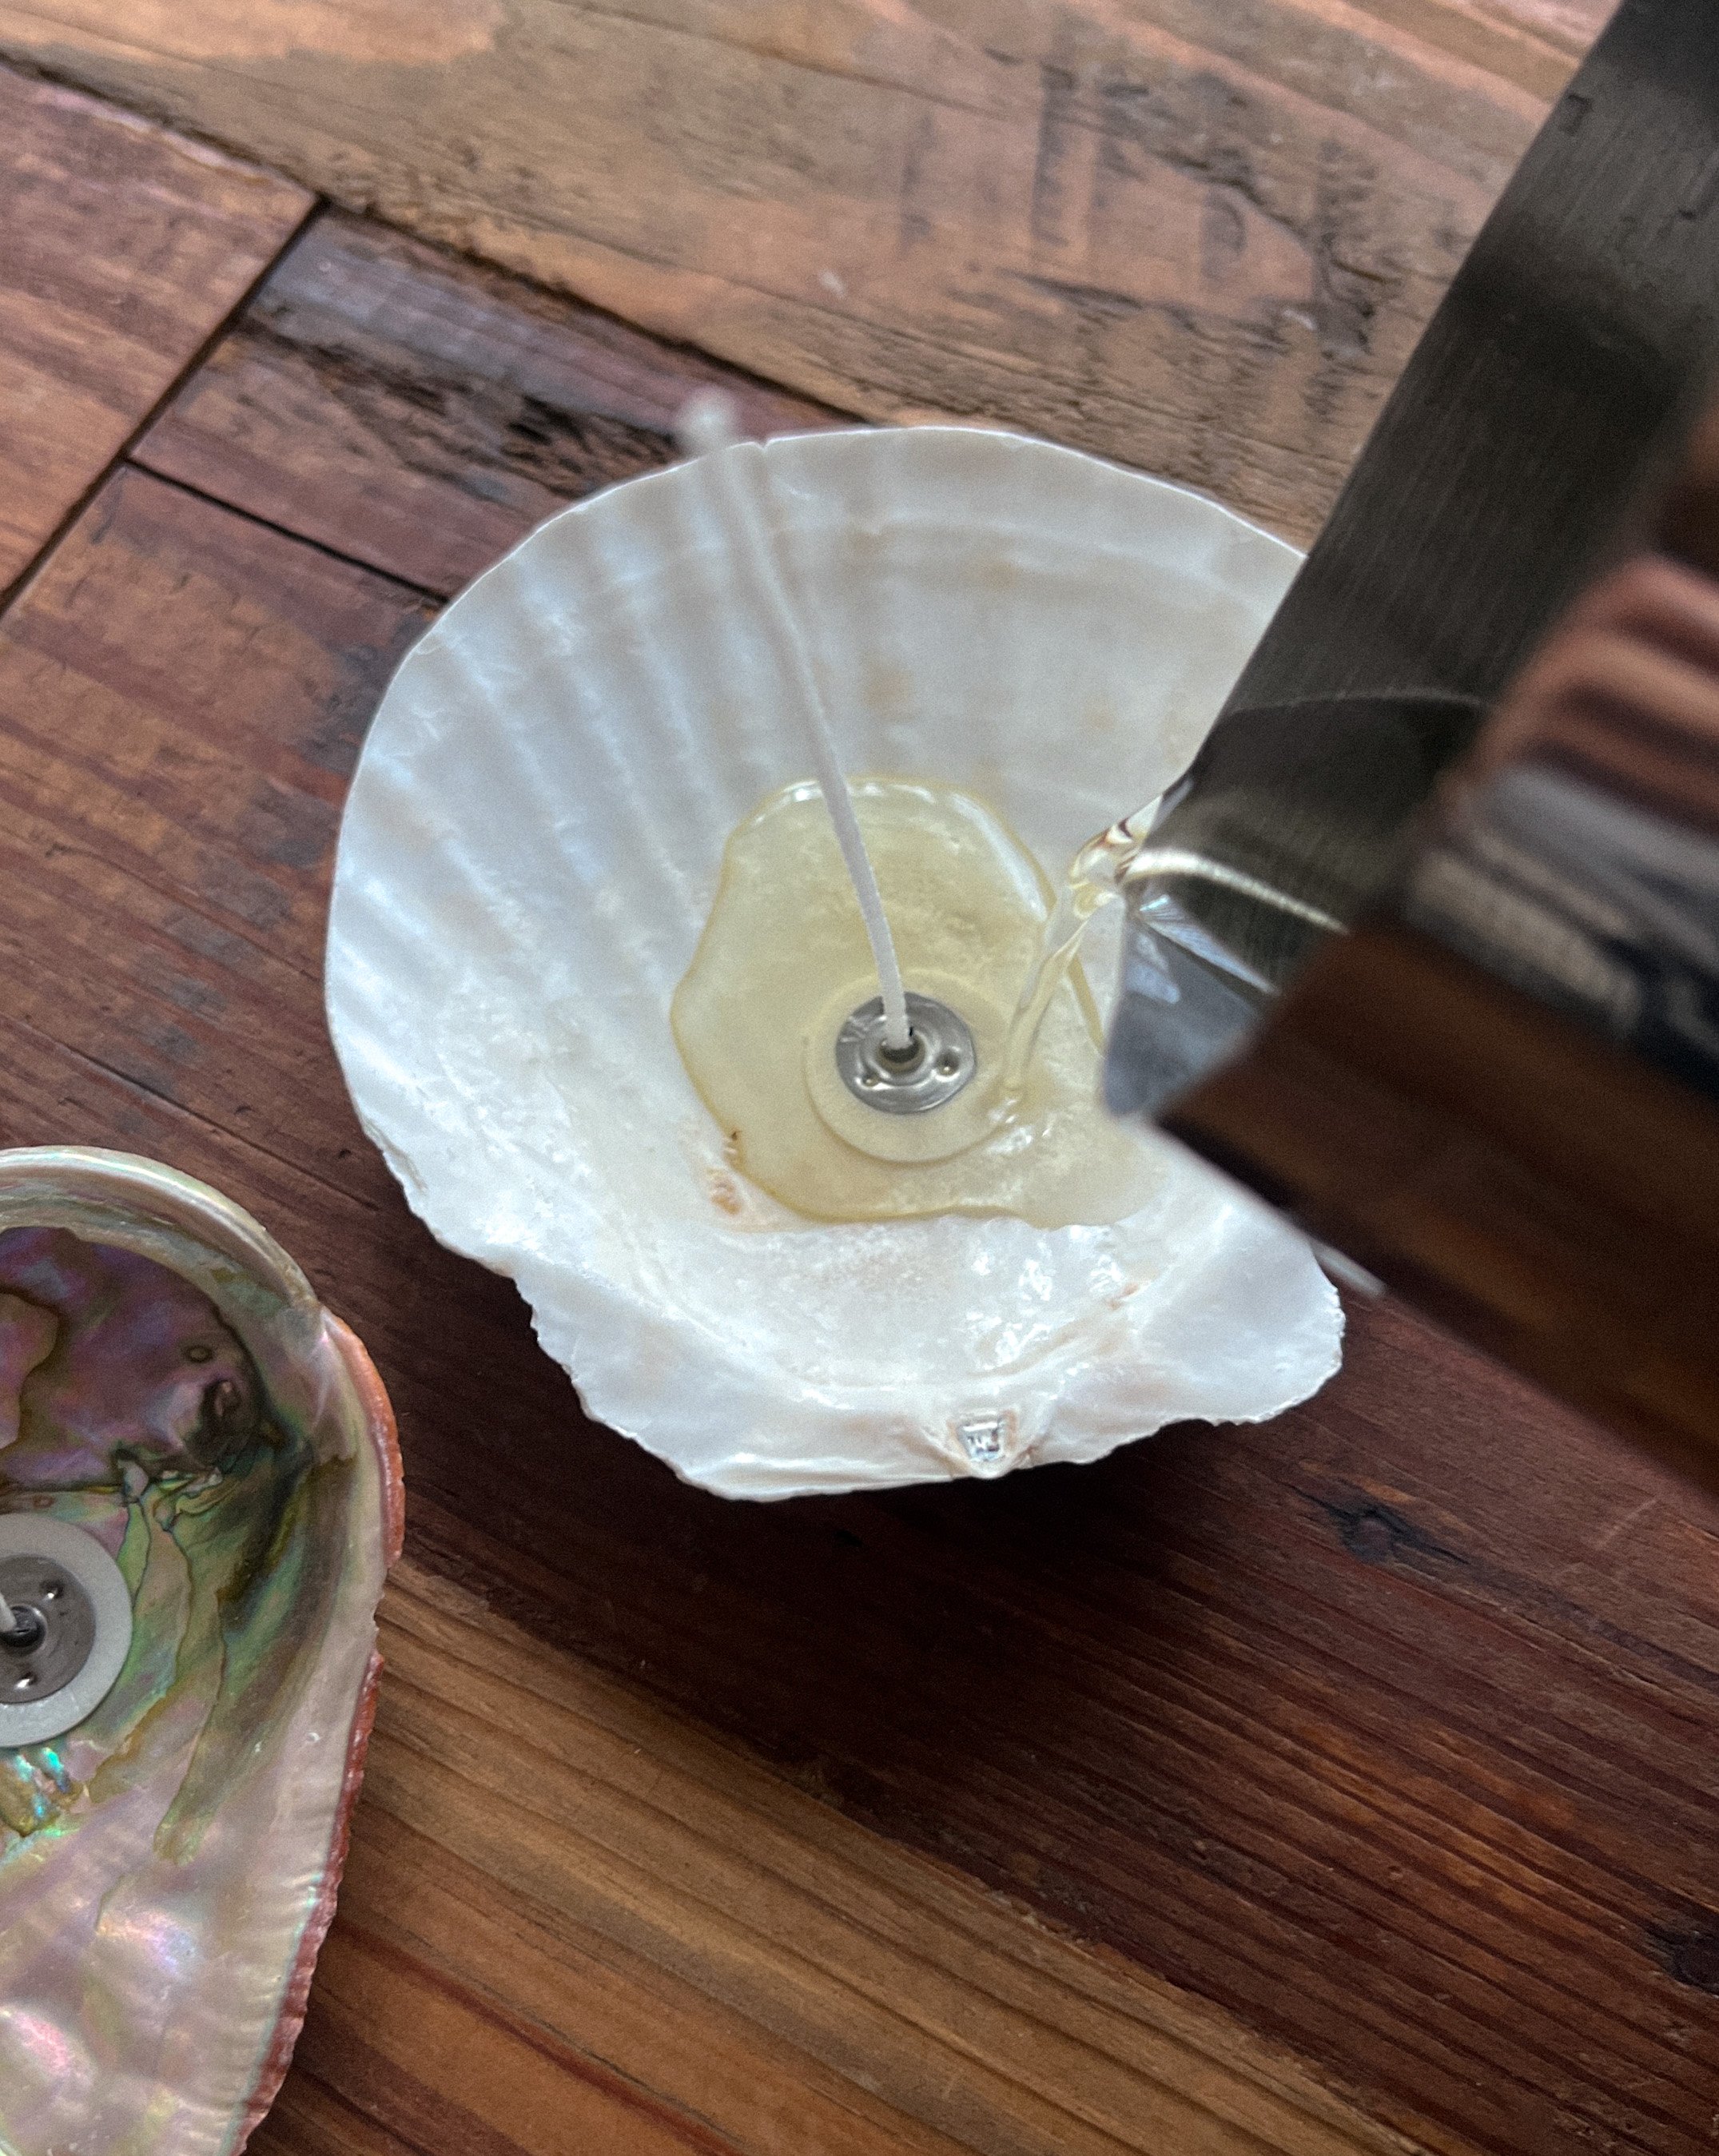
Step 1: Place the Wick in Your Vessel
No matter what kind of vessel you’re using, you’re going to need to place the wick inside as the first step. You can adjust and readjust until you feel like it’s sitting exactly how you want it to, and then once you use a wick sticker to keep it in place, you can move on to the next step! Wick holder’s can also be very helpful for vessels that are deeper than the shells!
Step 2: Heat the Wax
It’s time to heat the wax for the candle. If you don’t have a double boiler, take a metal bowl that you feel comfortable heating wax in and place it in a saucepan with water, heating it on medium. As soon as it gets warm, add in your wax. It’s best to keep your eye on the wax as it melts, and stir occasional, but once it’s liquid through and through, you can take it off the heat and quickly move on to the next step.
P.S. If you’re going to add a scent, now is the time to do it! Just put in a few drops and stir the wax before it’s time to transfer.
Step 3: Transfer the Wax to Your Vessel
As soon as your wax becomes liquid, it’s important to transfer it immediately once you turn off the heat. If you wait too long, the wax will start to harden. This isn’t the end of the world, though. If that happens, just heat it up again and make sure to transfer as soon as it’s fully in liquid form.
As you’re transferring your wax, make sure to go slow and steady. Commit to the pour, and do your best to avoid pouring directly on the top end of the wick. Once you’ve transferred the wax to your vessel, you can take a step back and wait!
Step 4: Let it Cool before trimming the wick
It’s important to let your wax cool and completely harden before you start touching the wick or the vessel in general. As soon as the wax has completely set, you can trim the wick down to your desired length so that your candle has the exact look you’re going for. A little tip: be careful not to trim it too short or else it’ll be difficult to light without first melting some of the wax.
That’s it! Simple and easy! I chose a seashell this time, but I may choose a ceramic pumpkin for fall when the time comes. These little seasonal candles are just such a fun way to spice up your home decor and bring a little bit of the season in. Plus, anytime I make these candles, it forces me to slow down a bit, and if you’re a busy gal like me, those moments make a difference.