
4 EASY COLORFUL CHRISTMAS CRAFT IDEAS
I’ll be honest, I’m not usually one for DIYs. There’s a part of me that loves how relaxing it can be working on a craft, but another side that gets easily distracted and never finishes a job. And most times, I don’t even entertain the idea of a “do it yourself” because it feels so daunting. But this holiday season I’ve been hot gluing and adding glitter to everything I can. Here are a few simple DIYs (PomPom Trees, Ornaments, Wreaths and FALALA garland) that I tried first, so you know that if this self proclaimed anti-DIYer can do it, you can too.
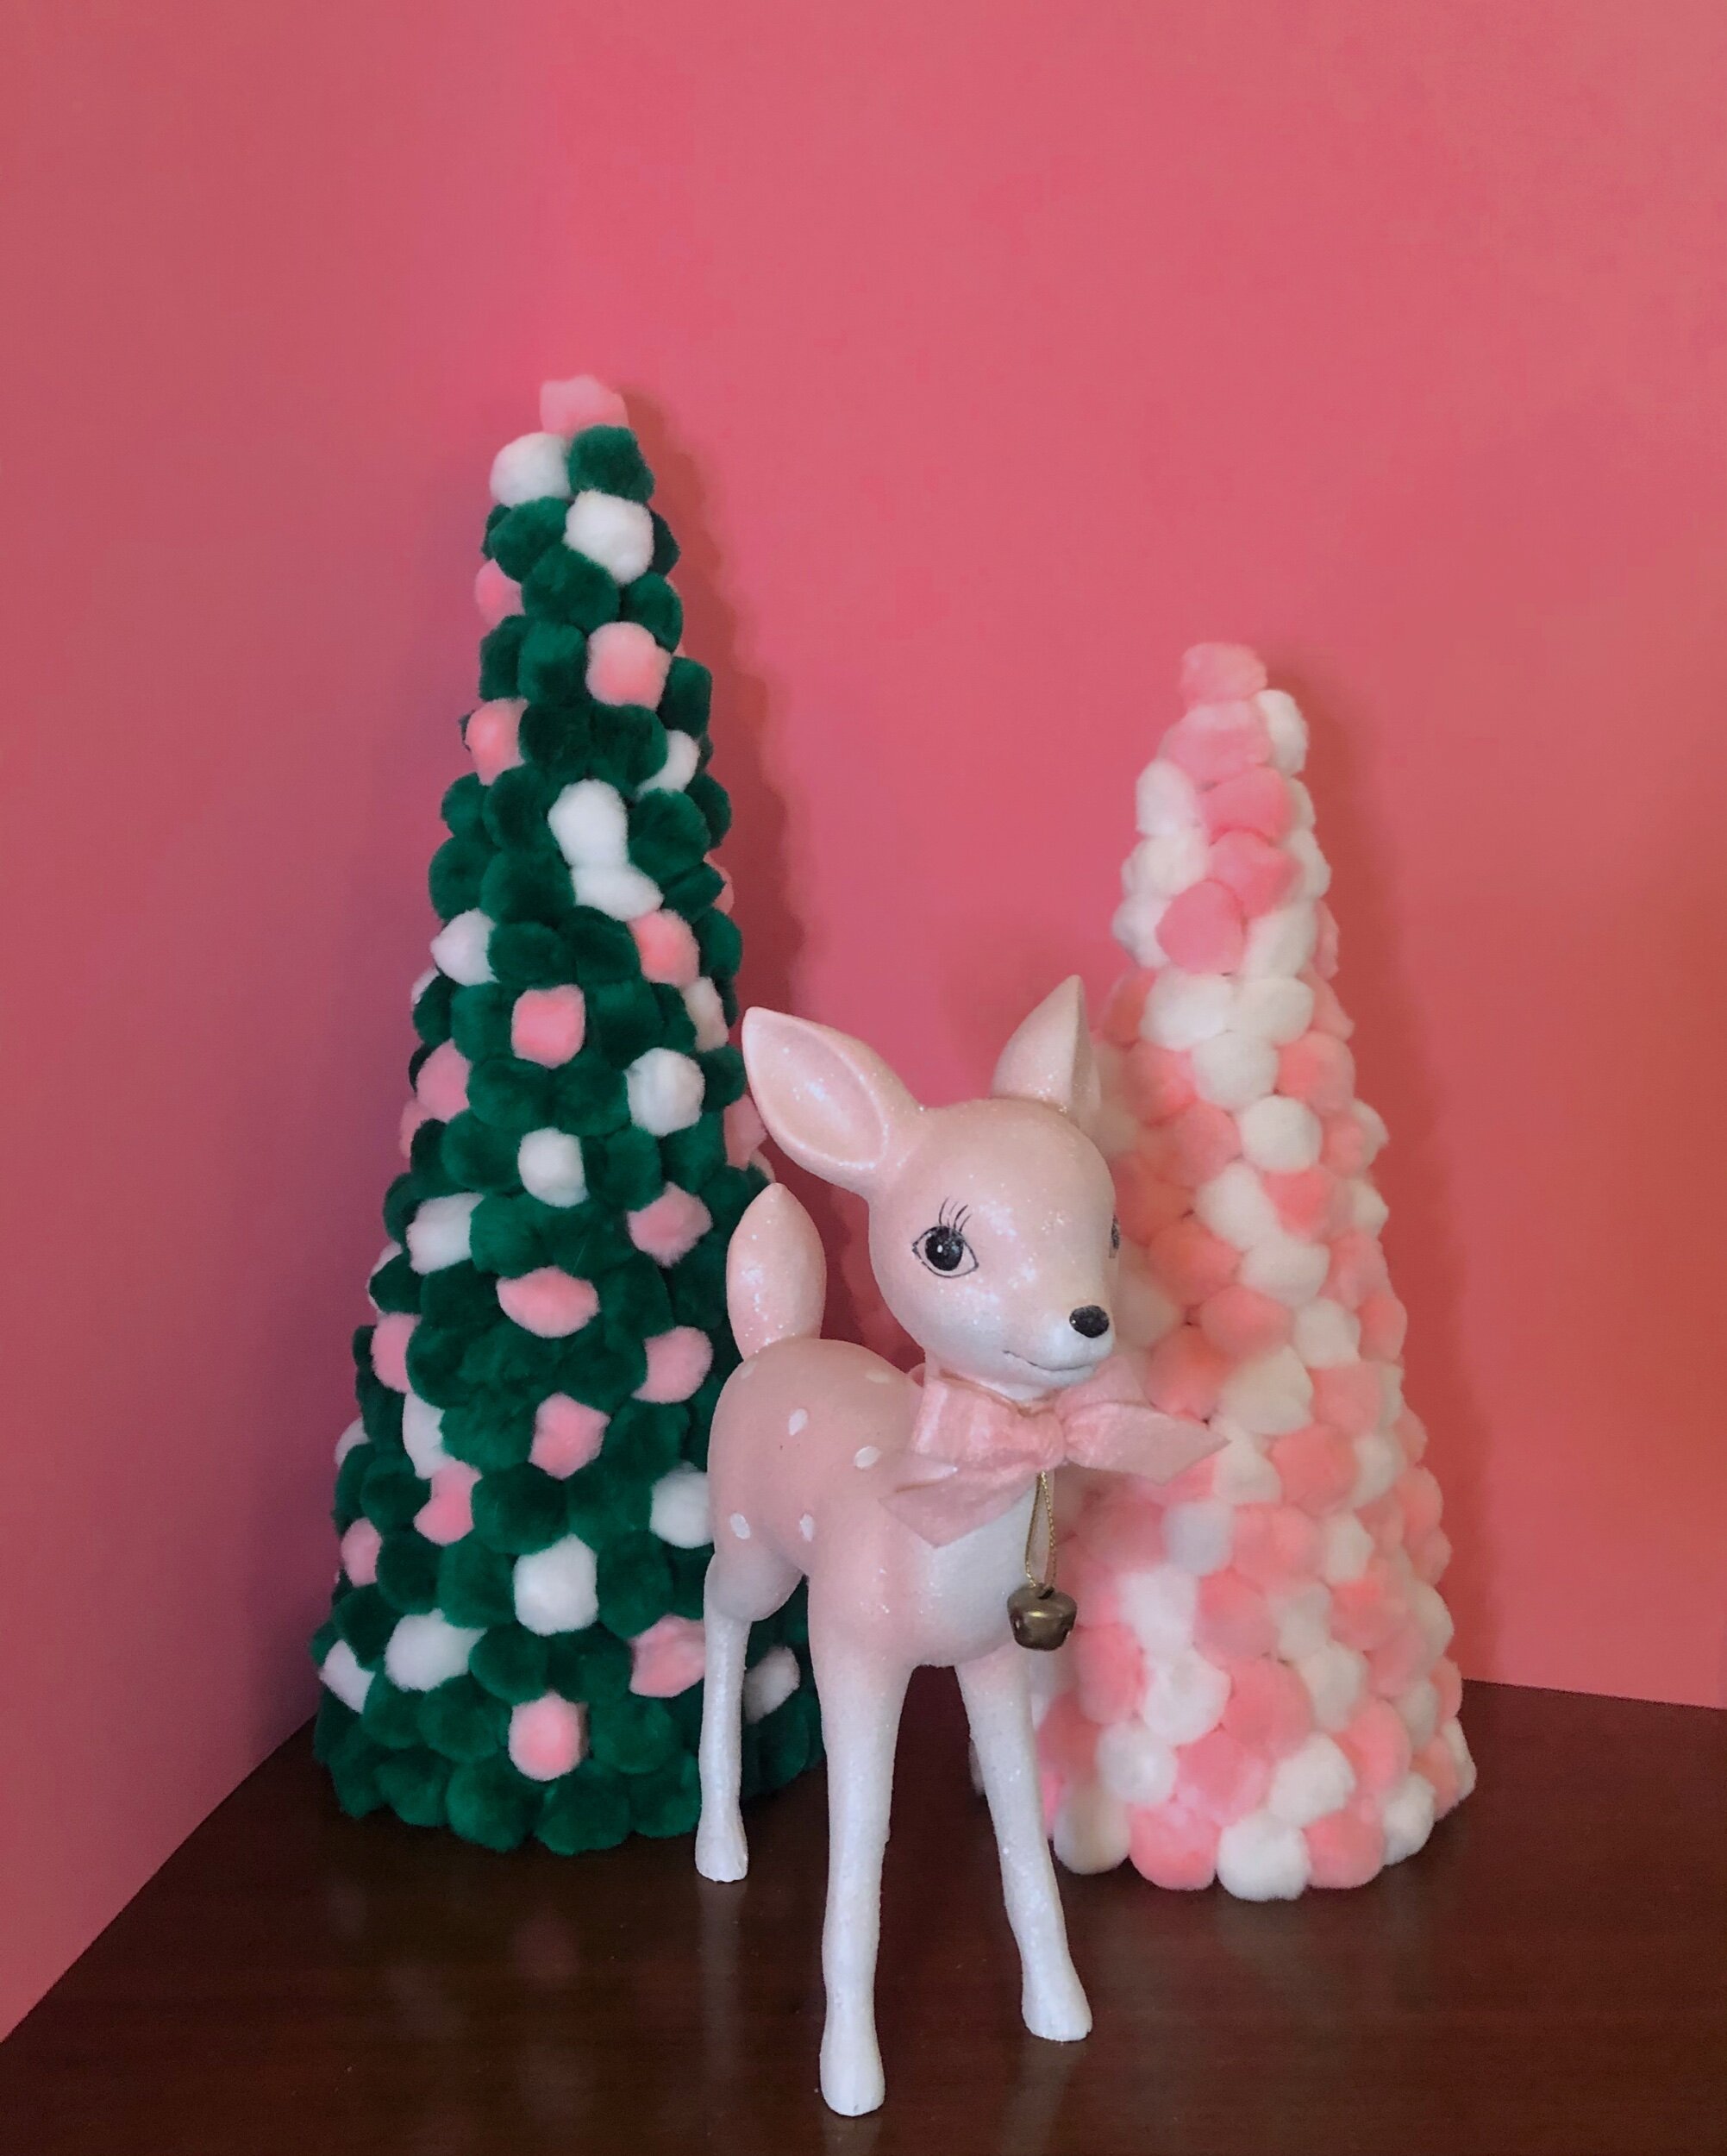
POMPOM TREES
All this madness started with the pompom trees. I saw a cute pompom tree at Target and thought, I could make that and save some $$$. Plus, this way I could customize the colors to my liking.
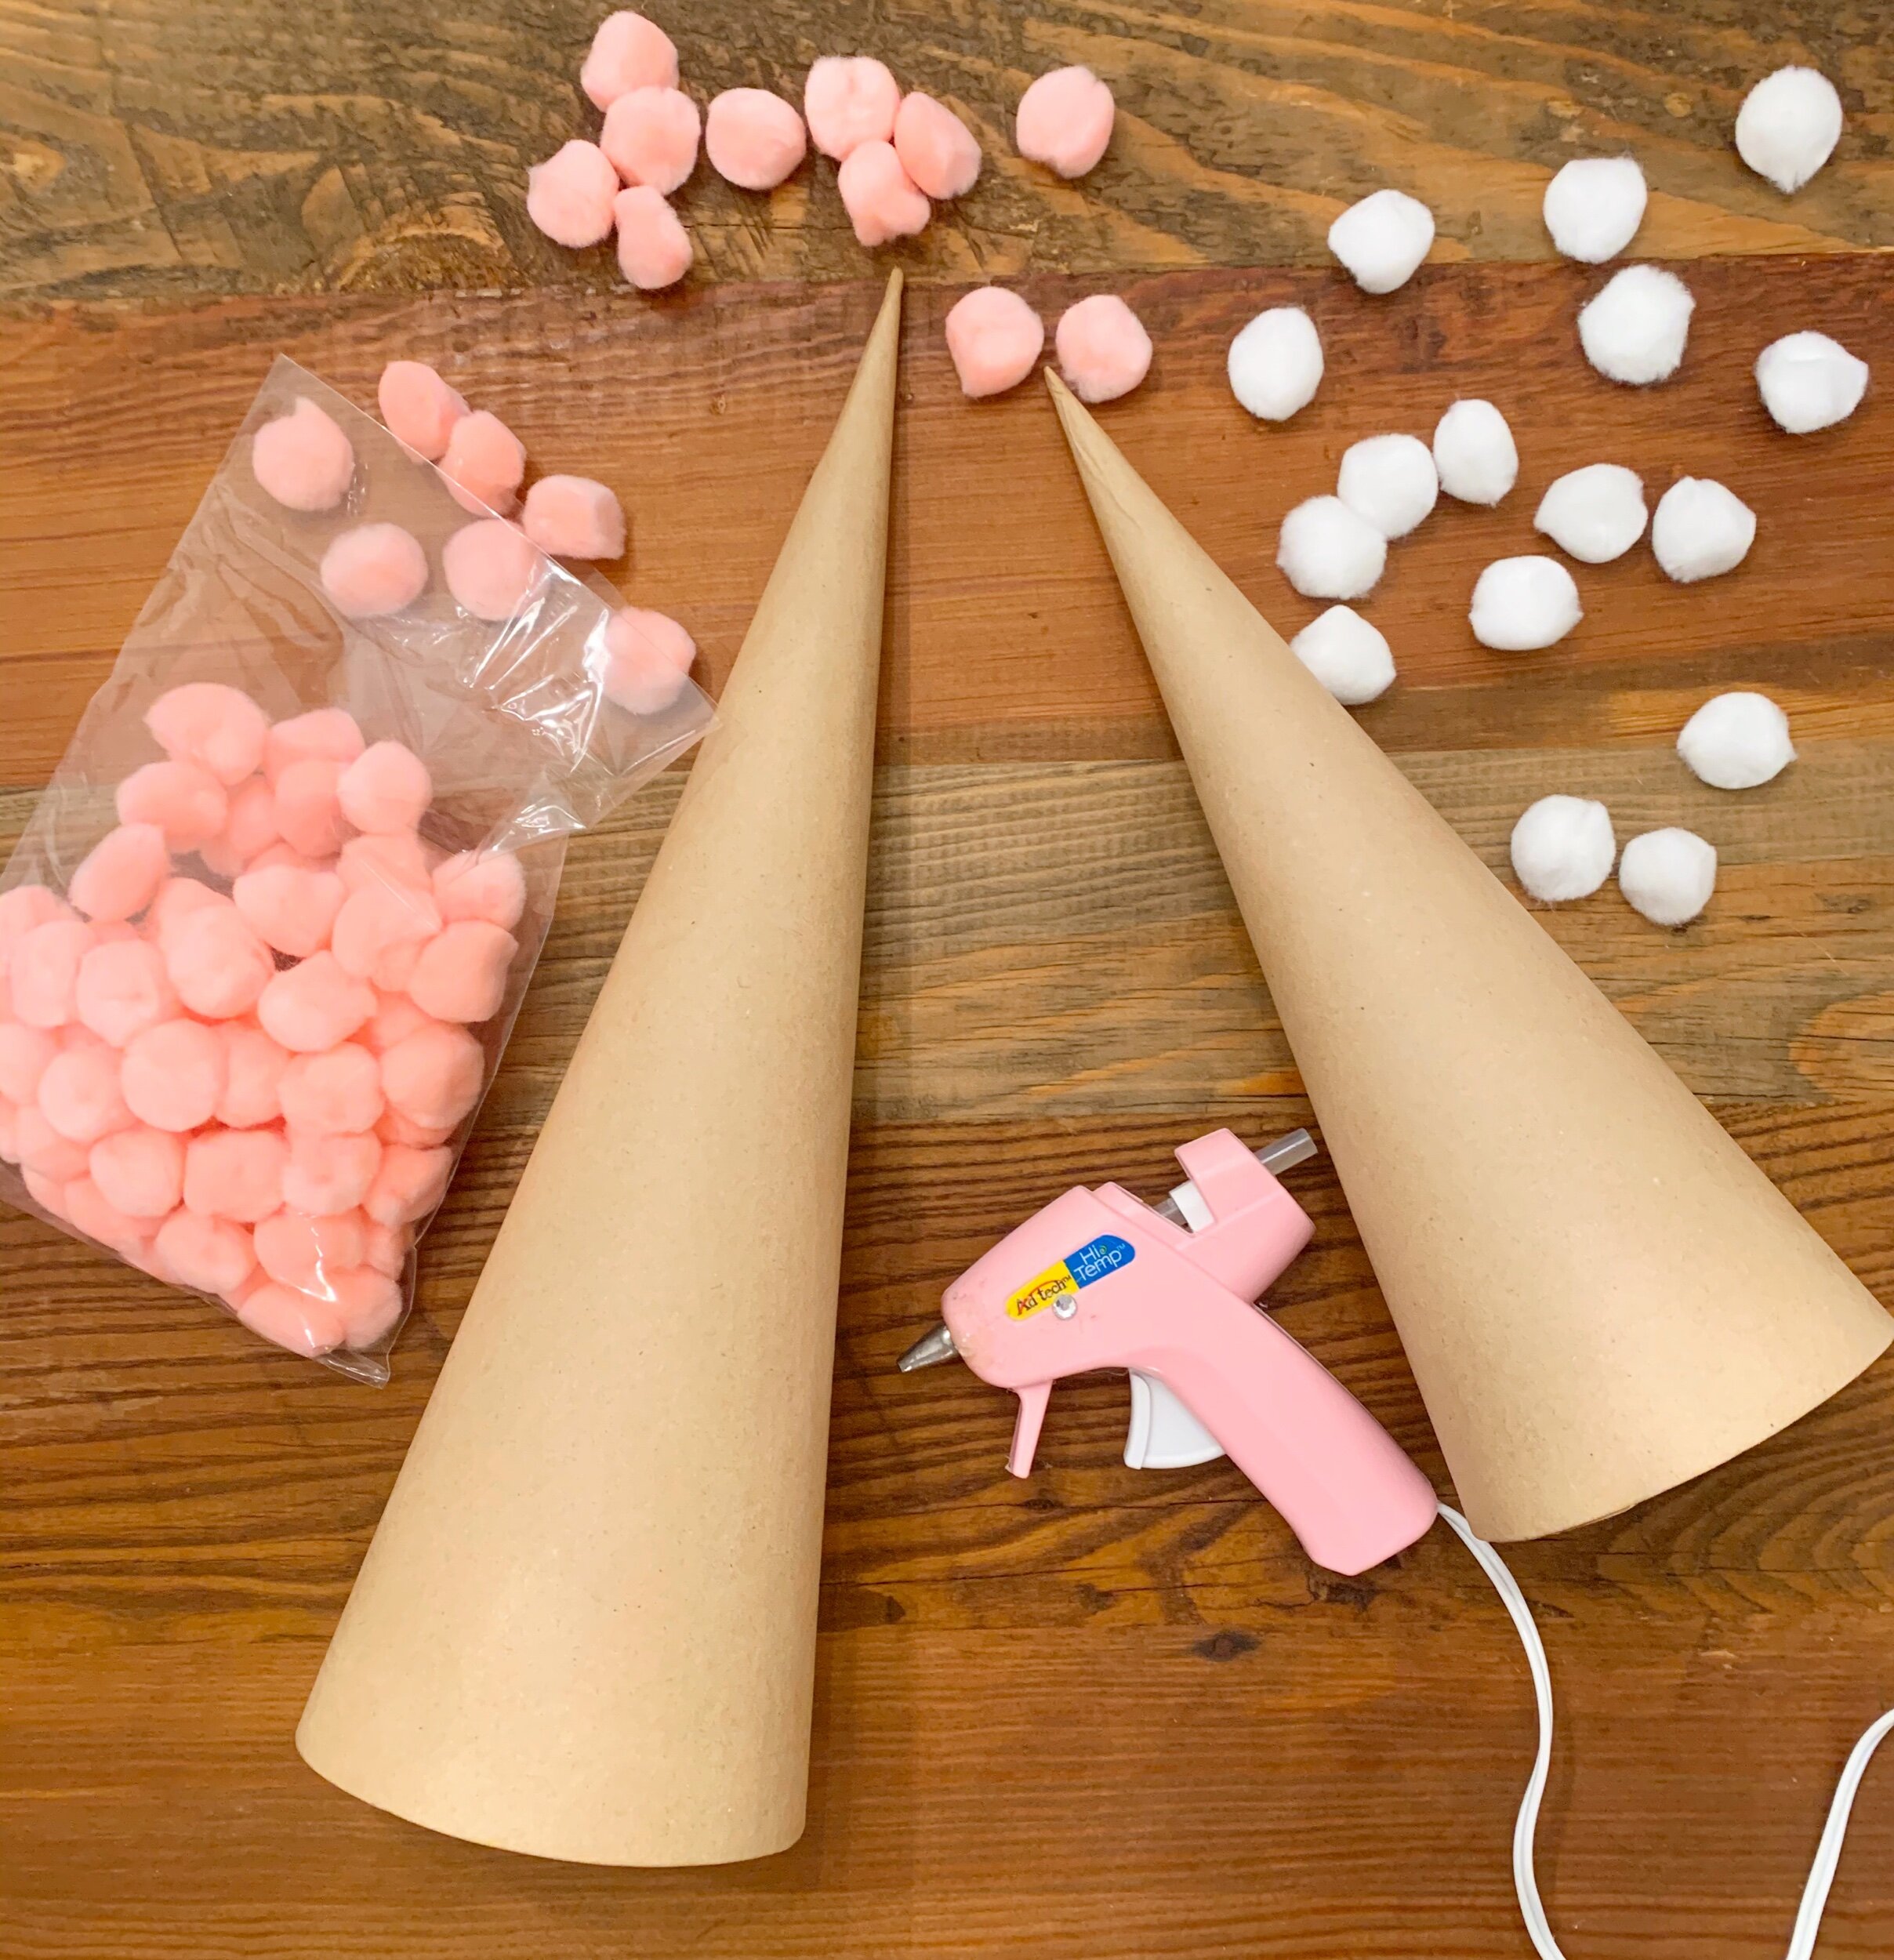
What you will need:
- Paper Mache Cones (These are the cones I used, but check your local craft store)
- PomPoms
- Hot Glue Gun
Choose your cone:
I had a cone that was roughly 11 inches and another that was 14 inches. I used 1 inch pompoms (roughly 6 bags of 80, had some leftover of white/pink so, lots of pompoms) but you could go smaller or larger depending on the look you want and end up using more/less.
Start at the bottom and stagger on your way up with hot glue:
I started at the bottom and made one layer of pompoms all the way around the base. I started the next layer by gluing my first pompom in the middle of where two would meet and continued that around for each layer so it sort of has this staggered look, but that’s just a preference.
Hot glue tips:
I preferred to put my hot glue on the cone directly. I would usually do three little “dollops” at a time of glue and then add my pompoms. I found it helpful at times to hold my hand inside the cone for support, but watch the heat of the glue especially if you put it on directly. I just continued this around until I reached the top, then chose a pompom to glue to the tip of the cone.

CLEAR ORNAMENTS
There’re literally a hundred million different ways you could decorate a clear ornament! Heres what I used for mine:
- Clear Plastic Ornaments
- Confetti
- PomPoms
- Stickers
- Hot Glue Gun
- Funnel or piece of paper
A few tips:
A lot of these are just about taking off the hook and filling the ornament! I used a funnel to help me with my confetti (you can also roll a pice of paper to act as a funnel) and a plastic chopstick to give it an extra push if it needed. I found it helpful to use a small shallow bowl to rest my ornament on while glueing pompoms to the outside of it.

FEATHER/TINSEL WREATH
This was one of my favorites to make because it was super simple and I loved how they turned out!
Here’s what you’ll need:
- Floral Foam Wreath and Craft Foam Ring
- Feather Boa
- Tinsel
- Ribbon
- Scissors
- Hot Glue Gun
- Thumb Tacks or Pins
- Pompoms (optional)
Choose the base:
I used a craft foam ring made from recycled plastics for my tinsel wreath and a floral foam for my marabou wreath. I knew I would want to use pins for the boa one and I felt like the floral foam would be easier to penetrate (I really tried to come up with a better word). Then I went with the craft foam ring for the tinsel because I thought it would work better with hot glue, which is how I wanted to secure the tinsel. Update: they both held really well using these methods!
Secure the boa to the back:
For the feather one, I started by taking one end of the boa (there’s a string that runs through it and usually hangs at the ends, grab this part) and then used a thumbtack to secure the string/cord to what I would I decide to be the backside of my wreath.
Wrap the boa or tinsel around the ring:
Once you have that secured you are ready to wrap! I brought the boa around the top and through the middle and continued this until I ran out and was ready for my next boa. I secured the other end same way I did the first, with a thumbtack, through the cord into the foam. The feathers conceal the thumbtacks really well! I used 4 boa’s in total that were each 72 inches on a 11.7 in diameter ring. Really 3 and a half would’ve gotten me there, but wrapped the last one a little closer together and it worked.
You can basically use the same method of wrapping for the tinsel! This time I just used a hot glue to secure the end of the tinsel to the back of the wreath and then glued the other end once I reached the end of my wrapping. I used 2 1/2 of the 72 in tinsel on a roughly 8 in diameter ring. I could not for the life of me find a link to one that size on it’s own, but found it in a set. You can always go for the larger one and just get some extra tinsel!Leave a space to hang it:
Before wrapping my final boa/tinsel I left space to secure a ribbon to the back. I measured out 12 in of ribbon, and secured the cut ends to the back. For the boa wreath I secured the ribbon using a thumbtack. For the tinsel: hot glue.Add any cute details you want:
If you want to add some extra flair hot glue pompoms or ribbon! My wreaths have been hanging on doors for a few days now and both have stayed put! Those thumbtacks/hot glue really get the job done.


FA LA LA LA GARLAND
This one took me the longest, but was very satisfying to finally complete. Here’s what you will need:
- Cord/String
- Drill and 3/32 drill bit
- Wooden Letters (1 “F”, 4 “A”s, 3 “L”s")
- Acrylic Paint
- Glitter
- Cardboard
- Paper Plate
This one took some trial and error because as I mentioned before I’m not an expert when it comes to DIY. For example, the first holes I drilled were too small, then I didn’t drill enough holes on the “A”s so they didn’t lay right. I drilled one hole at the top in the middle, but I really needed to drill two like every other letter I did so it would face the right direction once I hung it up (it went sideways initially). I also learned that it’s maybe better to start by painting the backs and side of the letters before painting the front.
Paint your letters first:
Lay your letters out on a flat piece of cardboard for painting. Start with painting the back and sides. I found one coat of paint was plenty. Then let the backside/sides dry (check the paint bottle to see how much time it suggests to dry). After drying, paint the front of the letters one at a time. I had a small paper plate where laid down each letter, fresh paint side up, and then began to sprinkle the glitter. After I had enough glitter to cover the front of the letter, I held it up by the sides, shook off any excess glitter, then laid off to the side (on the same cardboard I used to paint) to dry.Drill the holes (2 on each letter):
Once all your letters are painted and glittered it’s time to drill. Using a pencil, mark where you want to drill the holes at the top of the letter. Each letter will need two holes. Once you mark, you are ready to drill. My 3/32 drill bit worked best. To drill you will want lay a piece of cardboard with letters to drill on either a slab of wood, grass or concrete. Make sure you know the in’s and outs of your drill before using it and be mindful of your fingers. It’s pretty easy to puncture the wood with the drill, just be ready for a dusty mess. After drilling each letter I would blow the dust off. I drilled before painting, but I think it would’ve been better to do it afterwards, because I ended up using my drill a second time to clear any paint and expose the hole again.String the letters together:
Once everything is all dried and the holes drilled, you are ready to string. I started with the “F”. I went in through the front on the left hole and pulled it back through the back of the 2nd hole on each letter. This way the string is looped in the back instead of the front of the letter. I used roughly 55 in of string.
I still have lots to learn when it comes to DIY (like actually getting more progress shots!) but I hope you have fun with these little crafts and hopefully they can inspire even more ideas! Please tag me on IG or Twitter to share your creations!
